Autocad Fusion 360 is a good product, but I can’t recommend it because it requires you to use a cloud service. One of its best features however is the thread tool. But how to make it work for parts that are 3d printed is a little confusing so I’ll explain how to make a simple nut and bolt.
STEP 1:
First create a new sketch and in the topview create a circumcised polygon about 15mm wide. This will serve as the profile for the nut and the bolt head. Type E to extrude the shape and in home view click the polygon shape and extrude the shape to 10mm as a new body and hide the visibility of the object after naming it “bolthead” when done do this again, but as a new component instead of a new body and name it “nut”.
Step 2: Select the nut and create a hole centered on the top plane of the nut and select Extents “Distance”, Hole Type “simple” and the hole tap type “tapped” and select size 15mm Designation M15x1.5 and turn off the visibility of the nut to hide it.
Step 3: Create a cylinder diameter 15mm, height 30mm. Create thread and click the side of the cylinder. In the thread options make sure “modeled” is selected and use the same 15mm size, M15x1.5 type thread. After clicking ok name the threaded cylinder “bolt” and turn on the visibility of the bolthead and select both and click Modify Combine. Use join operation and rename to bolt. Turn off visibility for bolt and turn on visibility for nut.
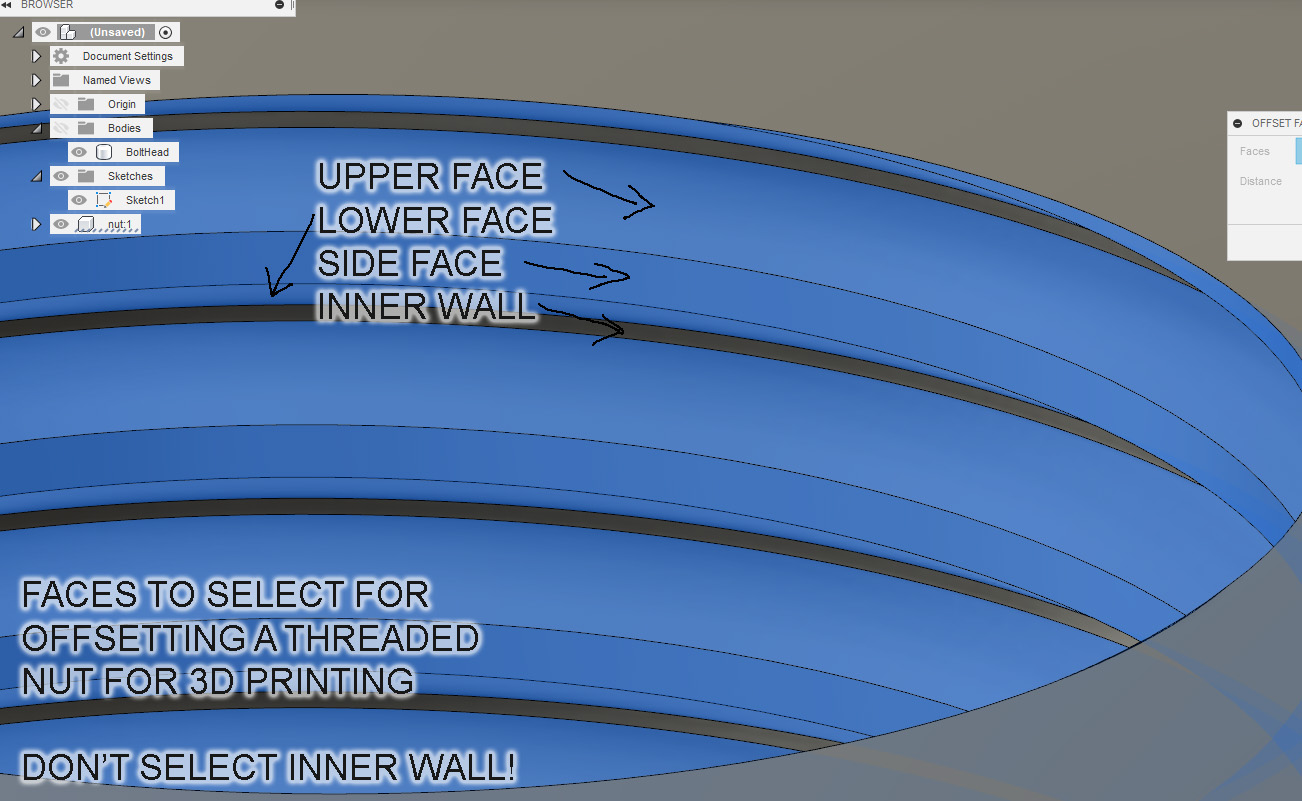
Step 4: Now you would think the nut would work, but it’s too tight. We must offset the faces a bit in a negative direction for a 3d printed part. Use Modify Offset face and select all three of the inside faces of threaded part of the nut; the thread surfaces that is; the upper surface that you can see from mostly above, the lower surfaces you can see mostly from the bottom and the side faces that can be seen from either, but not the inside walls. Look at the first picture below to see the blue areas that should be selected. Note that the inner wall is NOT selected, but the threaded parts of the nut ARE selected.
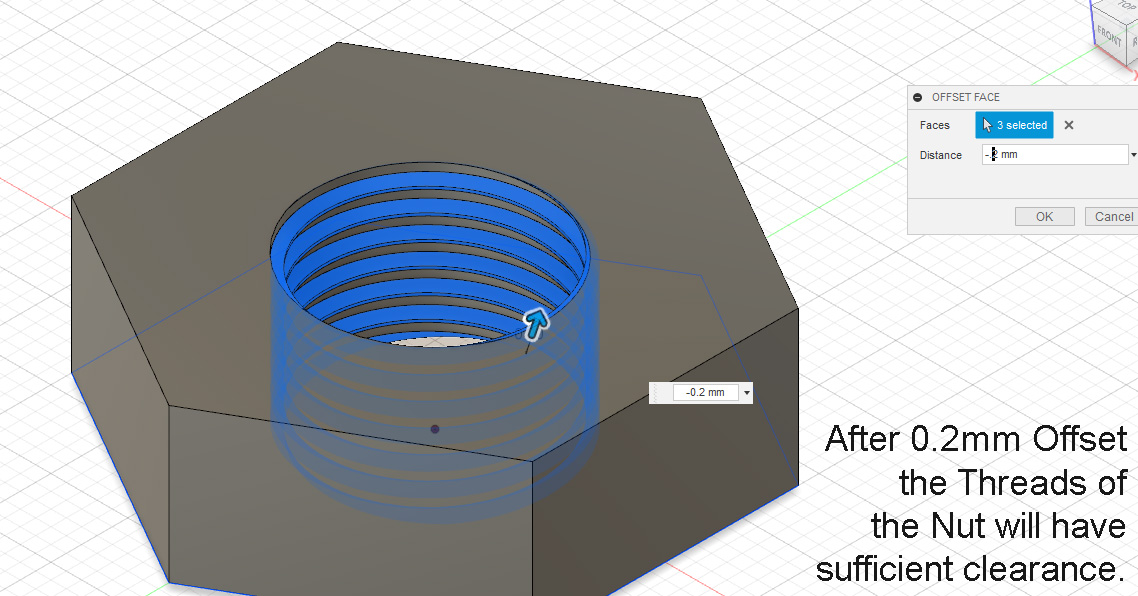
Offset the faces by negative 0.2mm. Click ok. And now the parts are done. In the picture above you can see how it will look after being offset.
Step 5: Turn on the visibility for both of the parts. Select the nut and right click on it in the browser and select Save as STL and export it with a high refinement to your Desktop naming it nut.stl and then do the same for the bolt naming it bolt.stl.
Step 6: Now just import both into Cura or whatever slicer. Slice it with a layer height of about .1mm and 100% infill and make sure the fan is set to be on at least around 50 and that you are printing at a low temperature so the threads don’t droop and export your gcode file and print as normal.


